Creating an Overlocked Seam Finish
Achieving a professional and polished look in your sewing projects often comes down to the finishing touches. One popular seam finish that is both functional and aesthetically pleasing is the overlocked seam finish. This technique not only prevents fraying but also adds durability to your seams. In this article, we will delve into the process of creating an overlocked seam finish, providing you with step-by-step instructions to master this skill.
Selecting the Right Stitch
Before diving into the actual process of creating an overlocked seam finish, it is crucial to select the right stitch on your sewing machine. The most commonly used stitch for overlocking seams is the overlock stitch or the serger stitch. This stitch is designed to wrap around the edge of the fabric, securing it while simultaneously providing a clean and professional look. Ensure that your machine is set to the overlock stitch before proceeding.
Preparing Your Fabric
Once you have selected the appropriate stitch on your sewing machine, it is time to prepare your fabric for the overlocked seam finish. Start by aligning the raw edges of the fabric that you intend to join. Make sure that the edges are even and match up accurately to ensure a neat finish. Pin the fabric together to hold it in place and prevent any shifting during the sewing process.
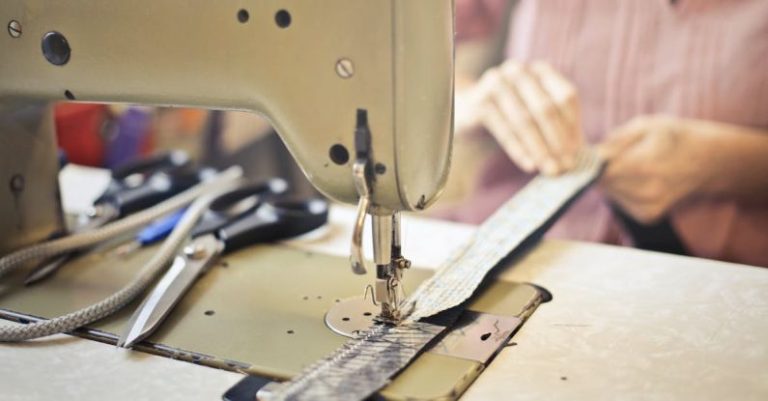
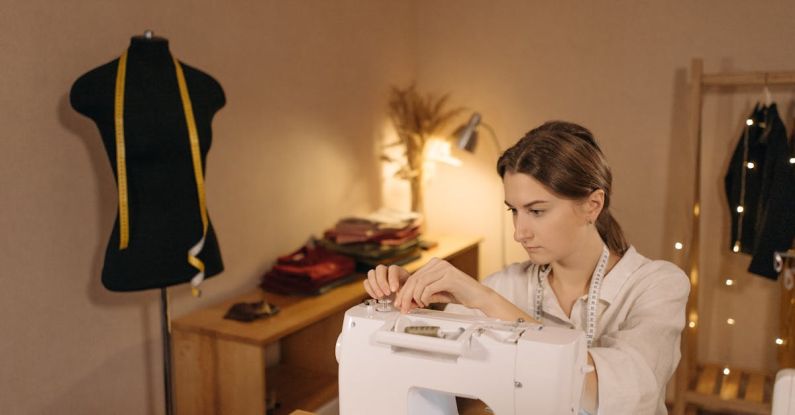
Sewing the Overlocked Seam
With your fabric prepped and pinned, it is time to sew the overlocked seam. Place the fabric under the presser foot of your sewing machine, ensuring that the edge of the fabric lines up with the edge of the presser foot. Lower the presser foot and begin sewing, guiding the fabric smoothly through the machine. As you sew, the overlock stitch will wrap around the raw edge of the fabric, enclosing it securely.
Finishing Touches
Once you have completed sewing the overlocked seam, it is essential to finish off the ends neatly. To do this, simply backstitch a few stitches at the end of the seam to secure the thread in place. Trim any excess thread with scissors to ensure a clean and professional finish. Your overlocked seam is now complete, providing both a durable and aesthetically pleasing edge to your fabric.
Experimenting with Different Fabrics
While the overlocked seam finish is commonly used on woven fabrics, it can also be applied to a variety of other materials. Experiment with different types of fabrics to see how the overlock stitch behaves and adapts to each one. From lightweight cottons to heavy denims, the overlocked seam finish can enhance the durability and aesthetics of a wide range of projects.
Incorporating Decorative Elements
One way to elevate your overlocked seam finish is by incorporating decorative elements into the process. Consider using contrasting thread colors or decorative stitches to add a unique touch to your seams. These embellishments can transform a basic seam finish into a standout feature of your sewing projects, showcasing your creativity and attention to detail.
Maintaining Your Machine
To ensure the longevity and performance of your sewing machine, it is essential to maintain it regularly, especially if you frequently use the overlock stitch. Clean your machine regularly to remove any lint or debris that may accumulate in the bobbin area or feed dogs. Additionally, oil the necessary parts as recommended by the manufacturer to keep your machine running smoothly.
Embracing the Overlocked Seam Finish
In conclusion, mastering the art of creating an overlocked seam finish can elevate the quality of your sewing projects significantly. By following the steps outlined in this article and experimenting with different fabrics and decorative elements, you can achieve professional-looking seams that are both durable and visually appealing. Embrace the versatility of the overlock stitch and incorporate it into your sewing repertoire to take your creations to the next level.